Category: Body

Skincare, haircare, deodorant and personal care swaps, tested and compared.

  • Mixing gold and silver: how to style a two-tone ear

    Mixing gold and silver: how to style a two-tone ear

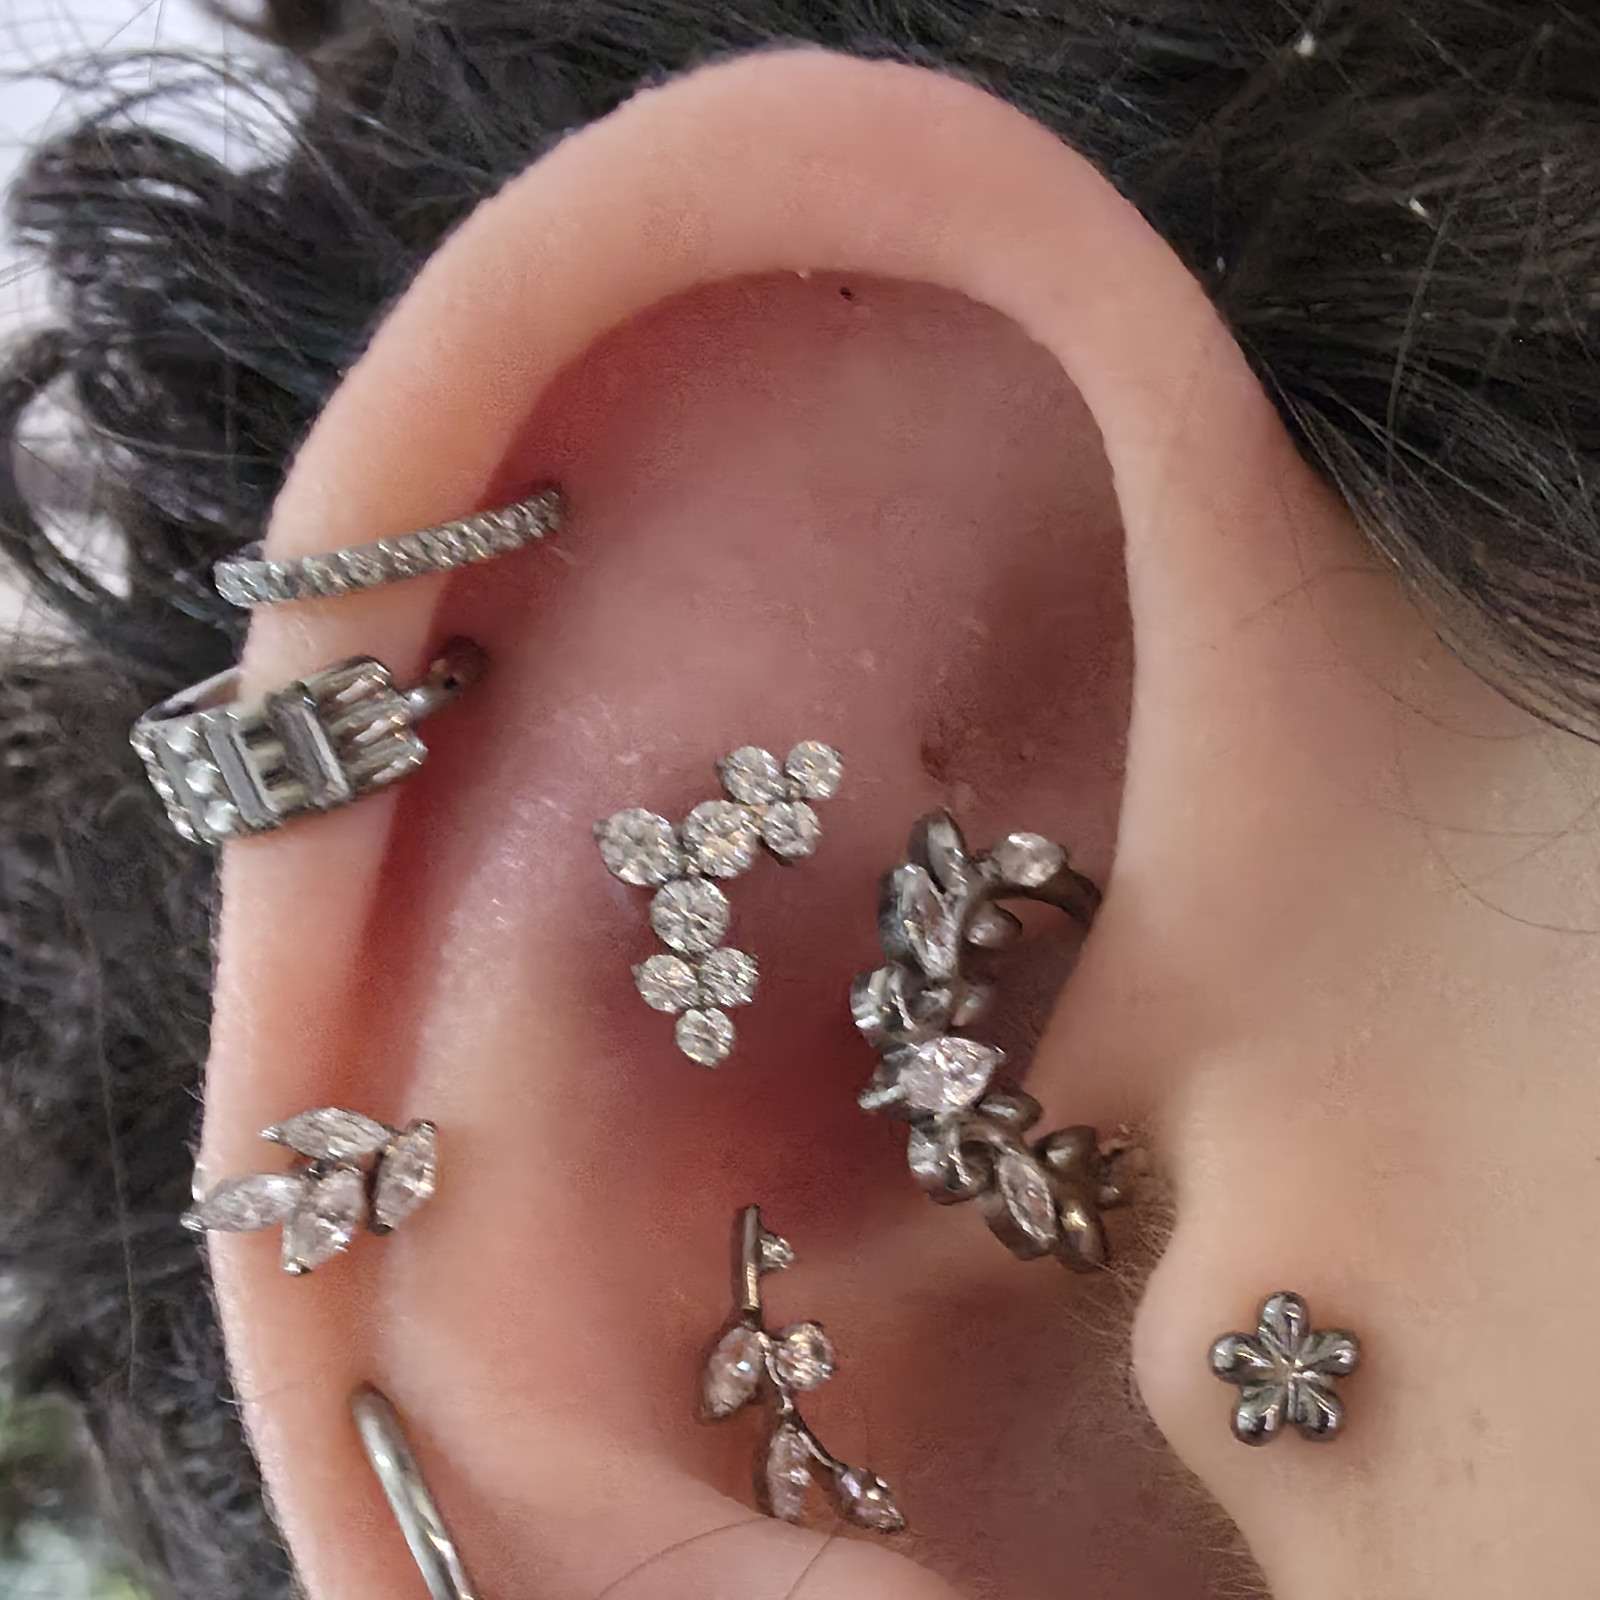
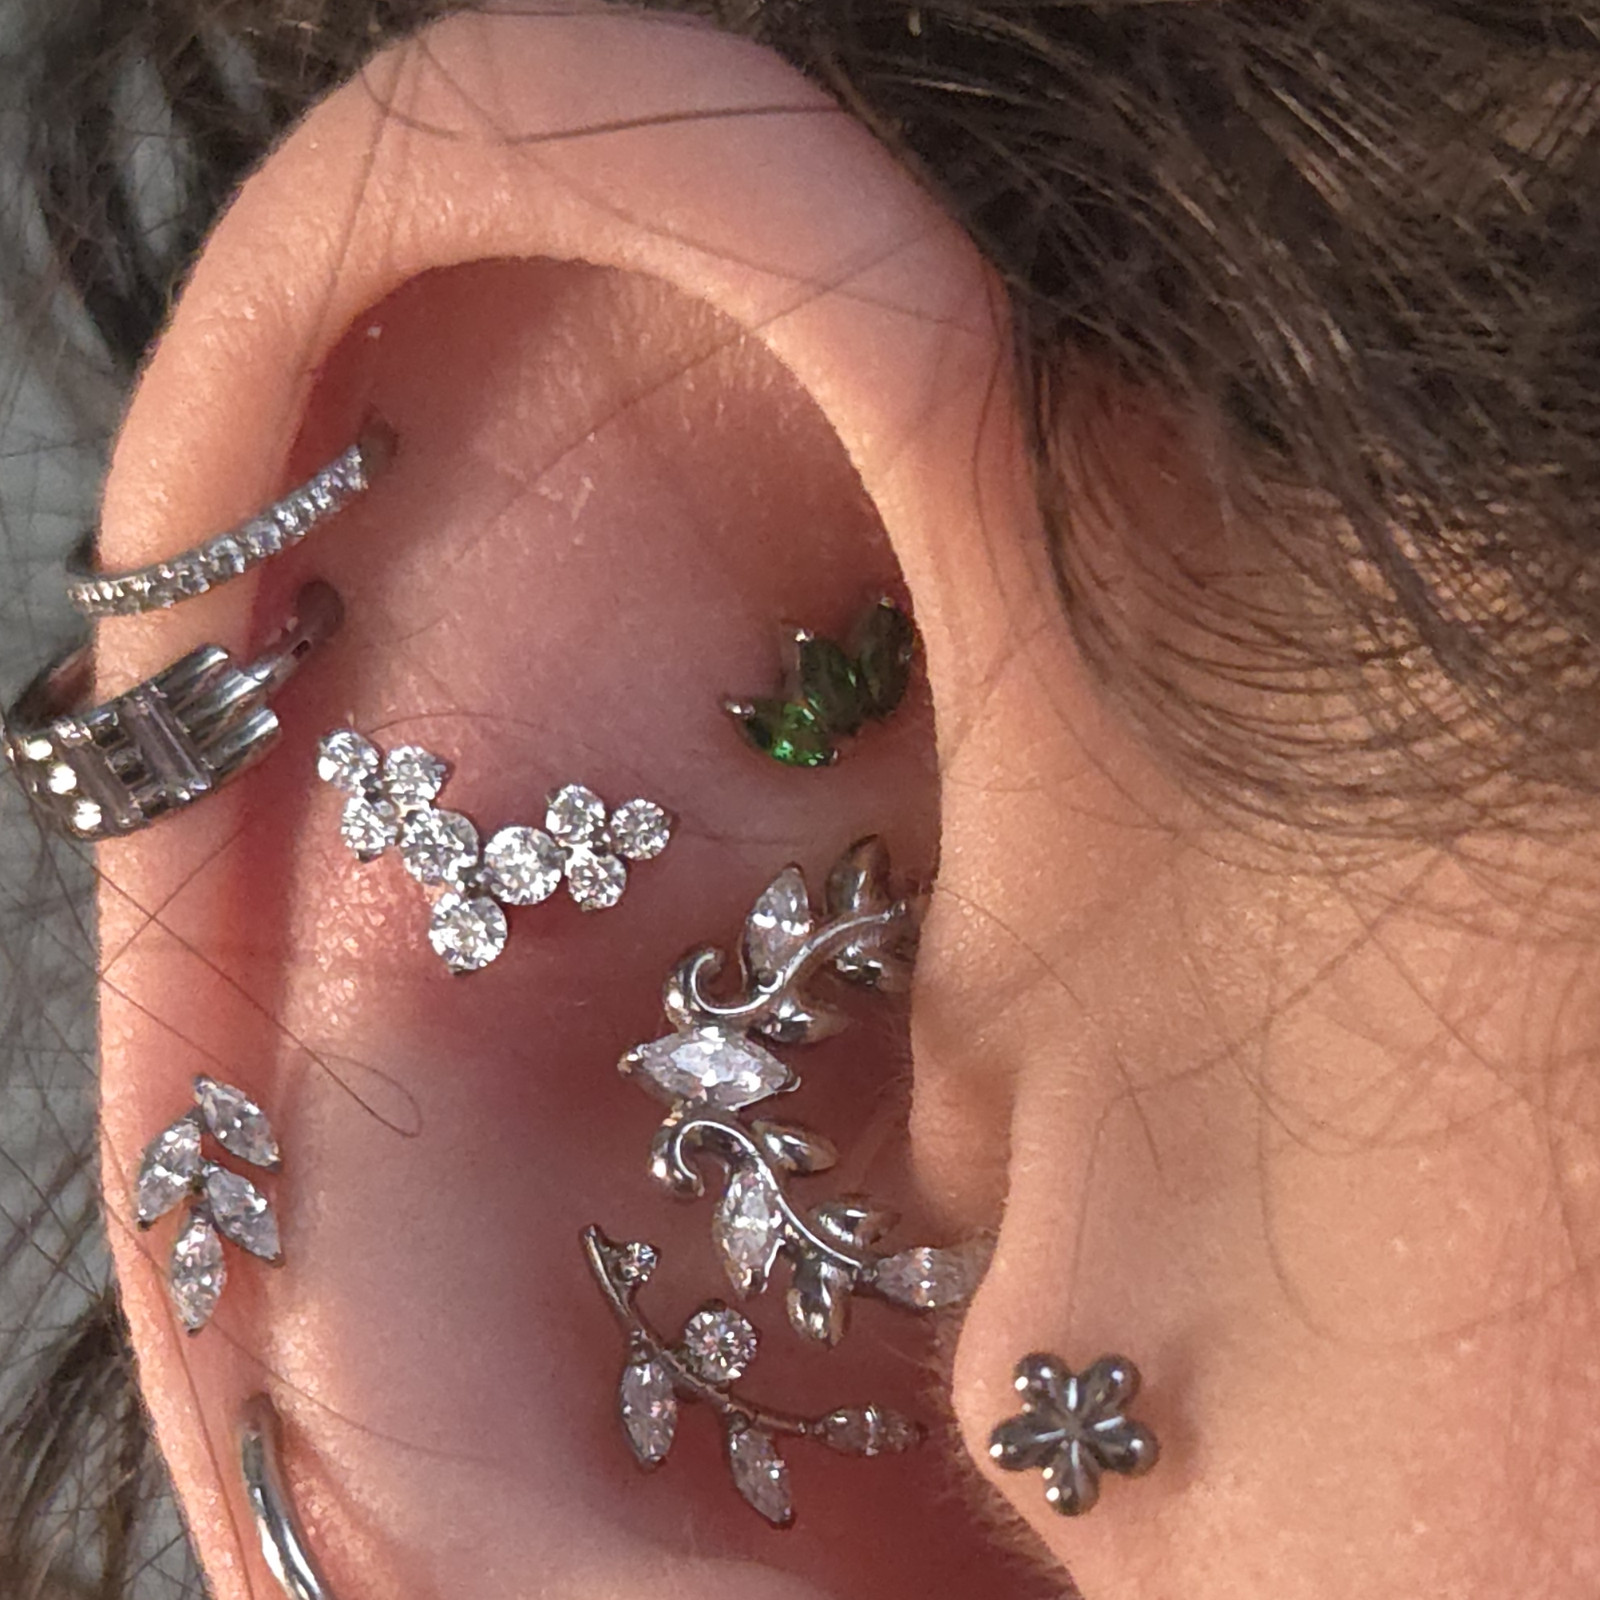
    A two tone curated ear mixing gold and silver pieces

    For years there was an unspoken rule that you should never mix gold and silver, that you had to pick a lane and stay in it. Happily, that rule is well and truly retired. A thoughtfully mixed two tone ear looks modern, personal and quietly expensive, and it frees you to wear all your favourite pieces together rather than sorting them by colour. This guide shows you how to mix metals so it looks intentional rather than accidental.

    The difference between a mix that looks styled and one that looks like a mistake comes down to a few simple ideas. Master these and you can combine gold and silver with total confidence.

    Why two tone looks so good

    A single metal throughout can look lovely, but it can also look a little flat or matchy. Mixing warm gold with cool silver adds contrast and depth, and it makes an ear look collected over time rather than bought in one go. It also happens to be practical, because it means every piece you own can play together, and it lets you tie your ear in with whatever other jewellery you are wearing on any given day.

    The golden rule: repeat each tone

    If there is one trick that makes mixing work, it is repetition. A single gold piece lost among silver reads as an accident, as though you forgot to swap it. But two or three gold pieces among silver reads as a deliberate choice. So whenever you introduce a second tone, repeat it at least twice across the ear. Your eye picks up the repetition and understands that the mix is on purpose.
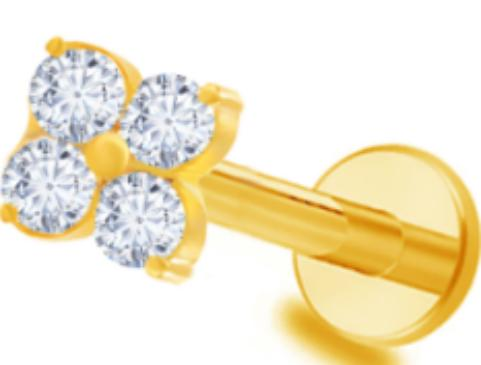
    A gold threadless stud, one half of a two tone pairing

    Think about balance and ratio

    You do not need a fifty fifty split, and in fact an uneven ratio often looks more natural. Try letting one tone lead and the other support, for example mostly silver with a few gold accents, or mostly gold with a couple of silver highlights. Spread the accent tone around the ear rather than clustering it all in one corner, so the eye travels and the whole ear feels balanced. A little planning here goes a long way.

    Use an anchor to lead the eye

    As with any curated ear, it helps to have an anchor, one slightly bolder piece that the eye lands on first. In a two tone ear, your anchor can sit in either metal, and the supporting pieces in both tones arrange themselves around it. Choosing an anchor stops a mixed ear from feeling scattered and gives the whole arrangement a centre of gravity. My curated ear guide goes deeper on anchors and negative space.
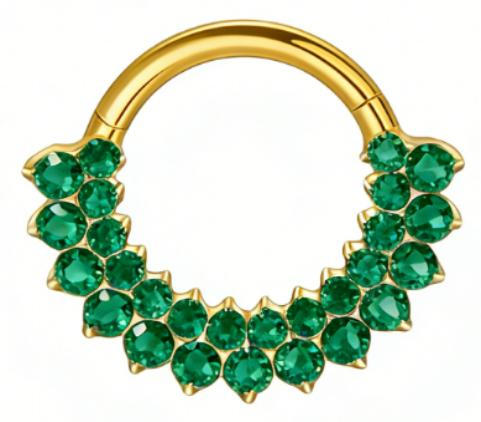
    A gold clicker that can anchor a mixed metal ear

    Warm and cool, skin tones and other jewellery

    Some people find that gold flatters warmer skin tones and silver flatters cooler ones, but honestly the loveliest thing about mixing is that you no longer have to choose, since a two tone ear carries both. It is also worth glancing at the other jewellery you wear most, your everyday rings, a favourite necklace or a watch, and letting your ear nod to those tones so everything feels connected. Style is really just a series of small, consistent choices.

    Keep it all safe underneath

    Mixing colours is a style decision, but safety is not negotiable, and it is easy to overlook when you are focused on tones. Whatever the finish, the metal against your skin needs to be body safe. If every piece, gold and silver alike, is nickel free implant grade ASTM F-136 titanium, you can mix tones freely without mixing in irritation. If you would like to understand why the base material matters more than the colour, my guide on safe metals explains it.

    Threadless makes experimenting easy

    The nicest way to find your perfect mix is to play, and threadless jewellery makes that effortless. Because the decorative tops push in and swap out in seconds, you can move a gold top here, a silver one there, and see how different combinations feel without any commitment. Build a small collection of tops in both tones and you can restyle a two tone ear as often as you like, which is half the fun.
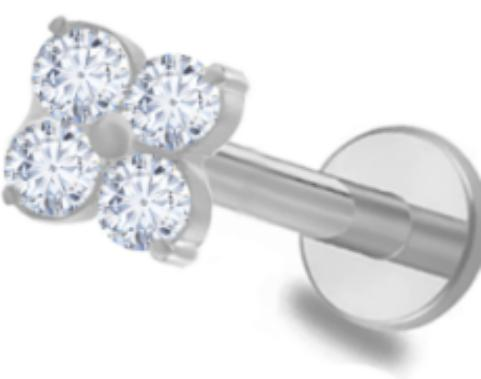
    A silver stud to balance the gold in a two tone ear

    A simple recipe to start

    If you would like a starting point, try this. Choose your ratio, say mostly silver with gold accents. Pick an anchor piece you love. Add two or three pieces of your lead tone, then place two pieces of your accent tone spread across the ear. Step back and check that the accent tone appears more than once and is not all bunched together. Adjust until it feels balanced, and you will have a considered two tone ear that looks like it took far more thought than it did.

    Most of all, trust your own eye. The rules here are really just gentle guidance, and the best mixed ears are the ones that look like the person wearing them. Play, repeat your tones, and wear what makes you happy.

    Mix finishes, not just colours

    Colour is only one way to add interest to an ear. Finish is another, and mixing it deliberately looks wonderfully considered. A high polish top catches the light, a brushed or matte finish is softer and more understated, and textured or hammered pieces add a little craft. Combining a couple of finishes within your gold and silver mix gives an ear depth and stops it looking uniform, in the same way a well styled outfit mixes textures rather than wearing all one fabric.

    Let stones bridge the tones

    Sparkle is a lovely bridge between metals. A clear gem set in gold and another set in silver echo each other across the ear, tying the two tones together even where the metals differ. Repeating a stone colour, whether that is clear white, a soft blush or a deep green, gives the eye something consistent to follow, so the mix reads as a coherent collection rather than a random assortment. Think of the stones as the thread that stitches your two tones into one look.

    When to keep it single tone

    Mixing is freeing, but it is not compulsory, and there are days and looks where a single tone simply feels right. A crisp all silver ear can look clean and modern, and a warm all gold ear can look rich and elegant. You might even keep one ear single tone and mix the other. The point of retiring the old rule was never to force mixing on anyone, only to give you permission to do as you please, so trust your eye and wear what feels like you.

    Growing a two tone collection

    The easiest way to build a two tone ear is gradually. Each time you add a piece, think about whether your accent tone still appears at least twice across the ear, and top it up if it has become outnumbered. With threadless, interchangeable tops, you can collect a few in each tone over time and rearrange them endlessly, which means your two tone ear can evolve with your taste rather than being fixed. A collection built slowly, piece by piece, is almost always the one that feels most like you.

    Tie your ear to your other jewellery

    A two tone ear does not exist in isolation, and one of the easiest ways to make it feel intentional is to let it echo the other jewellery you wear most. If you live in a gold necklace and a couple of silver rings, an ear that carries both tones suddenly ties your whole look together rather than clashing with half of it. You do not need to match everything precisely, just let the tones nod to each other. That quiet consistency is what makes a mixed look read as styled rather than accidental.

    Keep the mix body safe

    It is worth saying once more, because it matters most, that mixing tones is only ever a style choice laid over a foundation of safe materials. Whatever finish you choose, every piece that sits in your skin should be genuinely body safe, and nickel free implant grade titanium, in gold or silver, is the simplest way to get there. If you have ever reacted to mixed metal jewellery in the past, it was almost certainly the base material rather than the colour, which my guide on safe metals explains. Choose safe pieces and you can mix to your heart is content.

    In the end, mixing gold and silver is really just permission to wear everything you love at once. Repeat your tones, lean on an anchor, keep the base material safe, and then trust your own eye above any rule. The most beautiful two tone ears are simply the ones that look like the person wearing them, built slowly and worn happily, so play with your pieces and enjoy the freedom of a look that is entirely yours.

    And if you ever want a second opinion on a mix you are planning, send me a photo on Instagram and I will happily share my thoughts, because half the joy of jewellery is playing with it together and finding the combinations that make you feel most like yourself.

    Trusted sources

    Whatever tones you mix, keep the base metal safe. The Association of Professional Piercers lists suitable implant grade materials, and DermNet explains nickel allergy for anyone with sensitive skin.

    Gemma
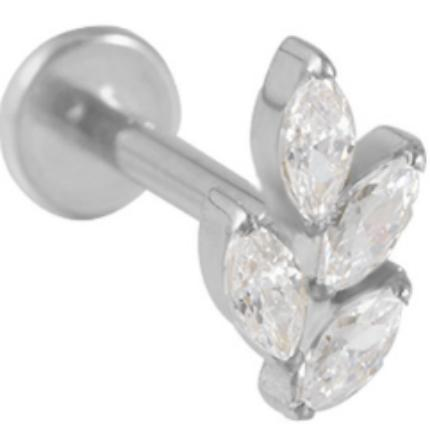
  • Flat back labrets: what they are and why they are so comfortable

    Flat back labrets: what they are and why they are so comfortable

    A gold flat back labret stud by Willow and Thorn

    If you have spent any time reading about piercing jewellery, you will have seen the words flat back labret again and again, usually alongside a piercer recommending them. There is a good reason for that. Flat back labrets are one of the most comfortable, versatile and healing friendly styles of jewellery you can wear, and they have quietly become the default for everything from lobes to cartilage. This guide explains what they are, why they are so loved, and how to choose and wear them.

    The name sounds technical, but the idea is simple, and once you understand it you will probably wonder why anyone wears anything else for a healing piercing.

    What a flat back labret actually is

    A flat back labret has three parts. There is a straight post, or bar, that goes through the piercing. On one end is a flat disc that sits flush against the skin behind the piercing. On the other end is the decorative top, the part you see, which might be a plain ball, a sparkling gem or a shaped design. The defining feature is that flat disc at the back, which replaces the clasp, butterfly back or curved wire that other earrings use.

    Why piercers love them for healing

    That flat back is the whole point. Because it is smooth and flat, there is no clasp digging in, no wire curving behind the ear and nothing to trap bacteria or catch on hair and clothing. It sits comfortably against the skin, which means far less snagging and tugging on a healing piercing. Less disturbance means calmer healing, which is exactly why piercers reach for flat back labrets when they fit initial jewellery.

    A silver finish flat back labret showing the smooth flat disc

    Comfortable enough to sleep on

    Anyone who has tried to sleep with a traditional stud and its poky butterfly back knows the problem. A flat back labret solves it. The flat disc rests against the skin without pressing a clasp into you, so sleeping on a lobe piercing is far more comfortable, and even cartilage piercings are easier to live with. For a piercing that needs months to heal, that everyday comfort makes a real difference to whether the healing goes smoothly.

    Threadless flat backs, and how they work

    Most flat back labrets are threadless, also called push in. The decorative top has a small pin that pushes into the hollow bar and holds by tension, with no screw thread to line up. This makes them quick to change and lets you mix and match tops on the same bar, so one comfortable labret can wear many different looks. If you would like the mechanics, my guide on threadless versus threaded jewellery covers it, along with how to insert and remove the tops.

    Where flat back labrets shine

    Their versatility is remarkable. In the lobe they are comfortable for everyday wear and for sleeping. On the helix and flat they sit neatly and show off a top beautifully. In the tragus and conch their low profile is ideal. Because the same style works across so many placements, a curated ear built mostly from flat back labrets looks cohesive and stays comfortable, which is a big part of their appeal for anyone planning a full stack, as covered in my curated ear guide.

    Getting the size right

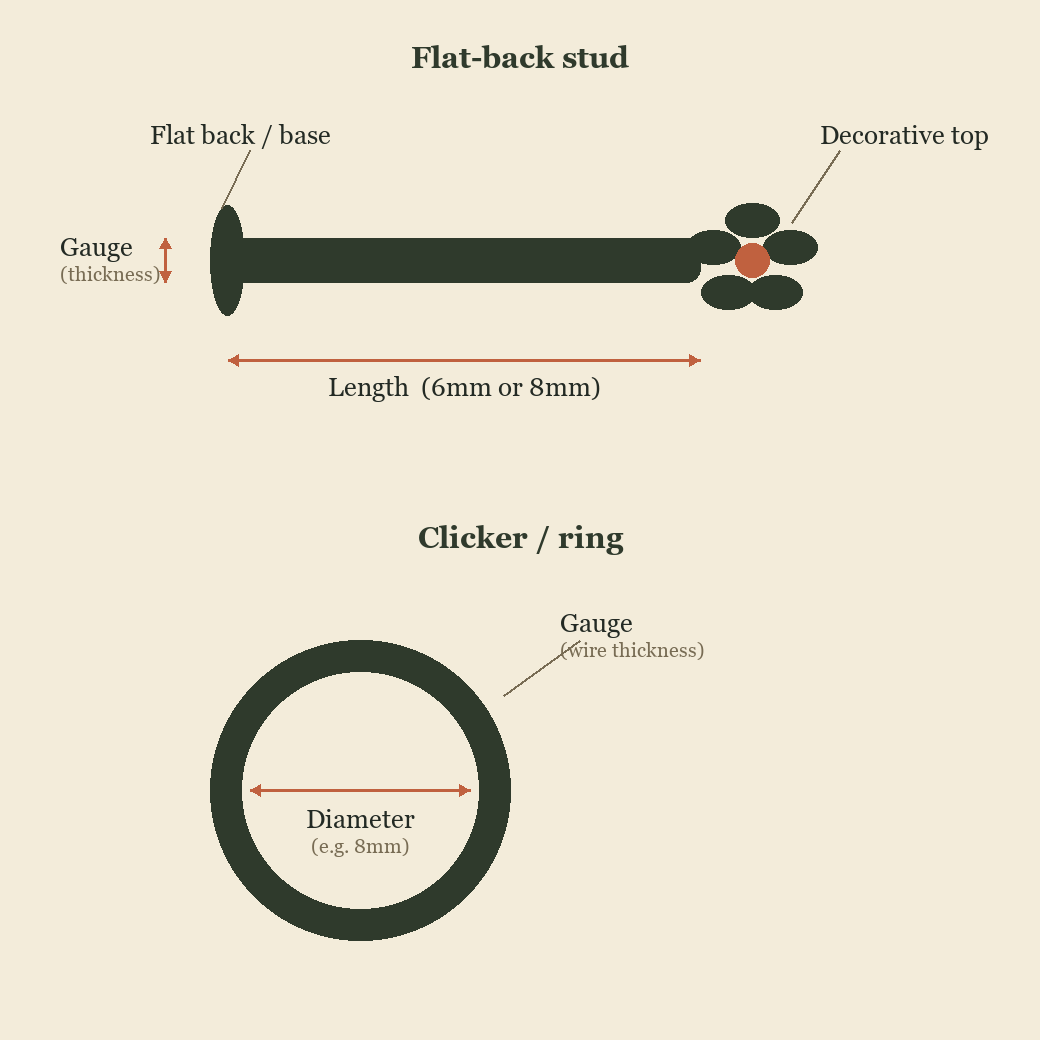
    Two measurements matter. The gauge is the thickness of the bar and must match your piercing so the piece sits securely. The length is how long the post is, which decides how snug the labret sits against your skin, with a little extra length allowed early on for swelling and a shorter length once healed. Getting both right is what makes a labret feel like it belongs, and the size guide walks through gauge and length with a diagram.

    A flat back labret shown with its smooth bar and low profile top

    Material matters just as much

    Because a flat back labret sits in close contact with your skin around the clock, the metal it is made from is as important as its shape. The best choice is nickel free implant grade ASTM F-136 titanium, which is body safe, lightweight and holds a lovely gold or silver finish. If you want to understand why the material matters so much for a healing piercing, my guide on safe metals explains it in full.

    Caring for your labrets

    Flat back labrets are low maintenance. Keep the piercing clean with a simple saline routine while it heals, wipe the jewellery before you change tops, and store your tops somewhere they will not get scratched. Handle the threadless pin gently and it will keep its spring for a long time. That is really all there is to it, which is another reason these pieces are such easy companions.

    If you are choosing jewellery for a new piercing, or simply want your everyday pieces to be more comfortable, a flat back labret is very hard to beat. Comfortable to sleep in, kind to healing skin, endlessly restyleable and safe against your body, it is the quiet workhorse of a beautiful ear.

    Flat back versus a butterfly back

    The traditional earring uses a butterfly back, that little sprung clasp that pushes onto the post behind the ear. Anyone who has worn one knows the downsides, as the clasp digs in when you lie down, traps skin oils and hair, and is fiddly to line up. A flat back labret replaces all of that with a single smooth disc. There is nothing to spring, nothing to poke you and far less to catch on, which is exactly why it is kinder to a healing piercing and more comfortable for everyday wear.

    Flat back versus a screw back stud

    Some studs use a screw on ball at the back, which is more secure than a butterfly but still leaves a bump of metal pressing behind the ear, and threading it on can be fiddly. Externally threaded versions also drag a screw thread through the piercing every time, which a healing piercing will not thank you for. The flat back sidesteps all of this by keeping the back flat and smooth and, in a threadless design, removing the screw entirely, so it combines security with genuine comfort.

    Choosing your tops

    Half the fun of flat back labrets is the tops. From a simple polished ball to a single sparkling gem to shaped designs, the decorative front can be swapped to suit your mood, all on the same comfortable bar. Because the system is interchangeable, a small collection of tops gives you many looks, and you can mix gold and silver tones across your ear too, as covered in my guide on styling a two tone ear. One comfortable labret can quietly wear a dozen different faces.

    A few common questions

    Will a threadless flat back fall out? Not when the pin tension is set correctly, and a quick press to check now and then is all it needs. Can you sleep in them? Yes, and that is one of their great advantages over clasp backs. Are they only for lobes? Not at all, as they suit the helix, flat, tragus and conch beautifully. And can you change the top yourself once healed? Absolutely, and my guide on changing your jewellery safely walks you through how.

    What sizes flat backs come in

    Flat back labrets come in a range of gauges and lengths so they can fit everything from a lobe to a snug cartilage piercing. The gauge is the thickness of the bar and needs to match your piercing, while the length decides how snug the flat back sits, with a little extra allowed for swelling in a fresh piercing and a shorter length once it has healed and been downsized. The size guide walks through gauge and length with a diagram so you can choose the right fit with confidence rather than guessing.

    Styling flat backs across an ear

    Because one comfortable style works across so many placements, flat back labrets are a brilliant foundation for a curated ear. Using them throughout gives an ear a cohesive, considered feel, and because the tops are interchangeable you can vary the sparkle from piece to piece while keeping the same easy comfort everywhere. Mix gold and silver tops, add the occasional hoop for movement, and you have a whole ear that is as pleasant to sleep in as it is to look at. My curated ear guide shows how to plan it.

    All told, the flat back labret earns its reputation. It is comfortable enough to sleep in, kind to a healing piercing, easy to restyle, safe against your skin and suited to almost every placement on the ear. If you are choosing jewellery for a new piercing or simply want your everyday pieces to feel better, it is very hard to do better than a well made flat back in nickel free titanium, and it will likely become the style you reach for again and again.

    If you would like a hand choosing your first flat back labret, or working out which gauge and length you need, message me any time and I will happily talk it through with you. There is never a silly question when it comes to your own piercing, and I would rather you asked than guessed.

    Trusted sources

    The Association of Professional Piercers recommends flat, comfortable styles for fresh piercings in their guide to jewellery for initial piercings, and their aftercare advice pairs nicely with it.

    Gemma

  • How to change your piercing jewellery safely

    How to change your piercing jewellery safely

    A threadless titanium labret, easy to change once a piercing has healed

    Changing your jewellery is one of the great joys of having piercings. It is how a single piercing becomes a canvas you can restyle whenever the mood takes you. Done properly it is quick, clean and painless. Done carelessly, or too soon, it can irritate a piercing or leave you wrestling with a stubborn clasp. This guide covers how to change each common style of jewellery safely, and just as importantly, when not to.

    As with everything, the golden rule is gentleness. Your piercing will reward calm, clean, unhurried handling far more than force. Let us start with the most important rule of all.

    First rule: only change a healed piercing

    Do not change the jewellery in a piercing that has not fully healed. Swapping too early reopens the healing channel, invites bacteria and can set you back weeks. Lobes are usually ready within a couple of months, but cartilage piercings often take many months to a year, and the outside looks healed long before the inside is done. If you are not certain, ask your piercer to confirm before your first change. My guide on what to expect while a piercing heals explains the timelines in more detail.

    Clean hands, clean jewellery

    Before you touch anything, wash your hands thoroughly and make sure the new piece is clean. Work over a soft surface, like a folded towel, so a dropped top does not bounce away or pick up grit. Good light and a mirror help enormously, and there is no prize for rushing. Setting up properly is half the job.

    Threadless, or push in, jewellery

    Threadless is wonderfully simple. To remove a top, hold the bar steady from behind with one hand so it does not turn in your piercing, then pull the top straight out with the other hand. Do not twist it, because there is no screw thread. To insert, give the little pin on the top the tiniest bend, line it up with the hollow bar and push it gently straight in until it seats. My full guide on threadless versus threaded jewellery has step by step detail if you would like it.

    A threadless push in fitting shown next to a threaded barbell

    Threaded jewellery

    Threaded pieces use a screw. Internally threaded jewellery has the screw on the top and a threaded hole in the bar, so you hold the bar steady and gently turn the top anti clockwise to loosen and clockwise to tighten. Take care not to cross the tiny thread, and never overtighten. Externally threaded jewellery, where the thread is on the bar, is best avoided for anything going through your skin, but if you have it, the same gentle turning applies.

    Rings and clickers

    Hoops come in a few styles. A clicker has a hinged segment that opens and clicks shut, and it is the easiest ring to live with, since you simply open the hinge, pass it through and click it closed. A seamless ring is a plain continuous circle that you gently twist open sideways, never pull apart, and twist closed again. Twisting keeps the shape true, whereas pulling the ends straight apart distorts it. If a ring feels like it needs force, stop and let your piercer help.

    Flat back labrets

    A flat back labret has a flat disc that sits behind the piercing and a decorative top at the front. With a threadless flat back you remove the front top as described above, and the flat disc and bar stay comfortably in place or slide out gently as one. The flat back is part of why these are so easy to live with, as there is no fiddly butterfly clasp hiding behind your ear.

    If a piece will not budge

    Sometimes a top feels stuck. Resist the urge to yank it. For threaded pieces, a clean dry grip and patience usually work, and a piercer can help if a thread has seized. For threadless, make sure you are pulling straight and holding the bar still rather than fighting against a turning piece. If something genuinely will not move, a two minute visit to your piercer will save you a sore piercing. There is no shame in it, and it is exactly what they are there for.

    A gold threadless top, ready to swap in for a fresh look

    Retainers and keeping the hole open

    If you need to hide a piercing for work or an event, a clear or subtle retainer keeps the channel open without an obvious piece of jewellery. Remember that healed piercings, especially in cartilage, can shrink or close faster than you expect if left empty, so if you love a piercing, keep something in it even when you are not styling it.

    Hygiene, storage and downsizing

    Give jewellery a wipe before it goes in and store your tops somewhere they will not get scratched or lost, a small dish or a lined box is perfect. If your piercing is newly healed and still on its first, longer bar, ask your piercer about downsizing to a shorter length, which makes everyday wear and future changes more comfortable. Look after your pieces and they will look after you, ready to restyle whenever you fancy a change.

    Once you are comfortable changing your own jewellery, a whole world of styling opens up. Mix your metals, swap a stud for a sparkle, add a hoop for movement, all from a small, well chosen collection. Take it slow at first, and it will soon feel like second nature.

    How often can you change your jewellery?

    Once a piercing is fully healed, you can change your jewellery as often as you like, and part of the fun of piercings is doing exactly that. The only real limits are gentleness and hygiene. Changing several times in one day is fine if you are careful, but if a piercing starts to feel tender after a lot of handling, give it a rest for a day or two. Listen to it, and it will tell you when you have fussed enough.

    Changing a top versus changing the whole piece

    There are two kinds of change, and they are not equally easy. Swapping just the decorative top on a threadless or internally threaded piece is quick and low risk, since the bar stays put in your piercing the whole time. Changing the entire piece, bar and all, means passing new jewellery through the piercing and asks for a little more care and cleanliness. When you just want a new look, changing only the top is the gentlest option, which is one of the joys of an interchangeable system.

    Travel, events and spares

    Life sometimes calls for hiding or simplifying your piercings, and a little planning helps. A clear or skin toned retainer keeps a healed piercing open discreetly for work or formal occasions. It is also wise to carry a spare top or two when you travel, because tiny pieces do occasionally go astray, and a healed piercing you love is worth keeping filled. A small pouch tucked in your bag saves a lot of stress.

    A little kit worth keeping

    You do not need much, but a small change kit makes life easier and safer. Keep some sterile saline, a clean lint free cloth, a little dish to hold pieces so they do not roll away, and a spare flat back or two. Store your collection of tops somewhere they will not scratch, like a lined box. With these few things to hand, changing your jewellery becomes a calm two minute ritual rather than a scramble, and your piercings stay happier for it.

    Warm up a stiff piercing first

    If a piece feels reluctant to move, a little warmth works wonders. Changing your jewellery just after a warm shower, when the tissue is relaxed and supple, makes insertion and removal noticeably easier and more comfortable than trying on cold, tense skin. Never force anything, and if it still resists, that is your cue to pause rather than push. A relaxed piercing cooperates, a fought one complains.

    If you drop or lose a piece

    Tiny tops and backs do occasionally escape, which is exactly why a spare or two is worth keeping. If a piece falls somewhere questionable, do not simply pop it straight back in, as it needs a clean first. Give it a wipe, make sure your hands are clean, and only then reinsert. And if you lose a top from a healed piercing, slot any clean spare into the bar to keep the channel open while you find or order a replacement, since healed piercings can shrink faster than you would think.

    Once changing your jewellery feels natural, a small collection starts to feel much bigger, because every piece can be worn a dozen ways. Take it slowly at first, keep everything clean, and be gentle, and you will soon be restyling your ear on a whim. That freedom to change your look in a few quiet minutes is one of the loveliest things about a well chosen set of pieces, and it only gets more fun with practice.

    Trusted sources

    Before you change a piece, it helps to read the Association of Professional Piercers on aftercare and healing and on what makes jewellery appropriate, so you change only a healed piercing and only into something safe.

    Gemma

  • Piercing bumps: why they happen and how to calm them

    Piercing bumps: why they happen and how to calm them

    A healing cartilage piercing with a simple titanium stud

    Few things worry a new piercing owner more than a small bump appearing next to a fresh piercing. The good news is that most bumps are common, harmless and fixable, and they are almost never a reason to panic or to rip the jewellery out. The key is understanding what kind of bump you are dealing with, what caused it, and what genuinely helps versus what makes things worse. This guide walks through all of that calmly.

    A quick and important note first: this is general information, not medical advice. If a bump is very painful, hot, spreading or oozing, or if you feel unwell, see your piercer or a doctor. With that said, let us demystify the humble piercing bump.

    What a piercing bump actually is

    A piercing bump is a small raised area of tissue that forms near a piercing, usually during healing. Most of the time it is your body reacting to irritation, a little pocket of inflammation or trapped fluid that appears because something is bothering the piercing. It is a message rather than a disaster, and once you find and remove the cause, the bump usually settles down over time.

    Irritation bump, infection, or scar

    It helps to tell these apart. An irritation bump is the most common, often a small flesh coloured or slightly pink lump that comes up after a knock, a bad night of sleep or a change in jewellery. An infection is less common and looks different, with heat, increasing pain, redness that spreads, and thick coloured discharge, and it needs prompt professional attention. A hypertrophic scar is a raised scar that can form as the piercing heals, and a keloid is a rarer, larger scar that grows beyond the original site. Most bumps people worry about are simple irritation bumps.

    A calm, well healed curated ear, the goal of good aftercare

    The usual causes

    Irritation bumps almost always trace back to something physical. The most common culprits are knocking or catching the piercing, sleeping on it, and jewellery that is the wrong size or is being changed too soon. Jewellery made from poor quality metal is another frequent cause, because a reactive metal keeps the piercing inflamed. Over cleaning is a surprising one too, since scrubbing a piercing several times a day irritates it just as much as neglect does. Touching the piercing with unwashed hands rounds out the list.

    What not to do

    When a bump appears, the instinct is to attack it, and that is usually the wrong move. Do not try to pop or squeeze it, as there is generally nothing to pop and you will only inflame it further. Do not increase your cleaning to several times a day. Do not slather it in random home remedies, some of which, like tea tree oil or harsh disinfectants, can burn delicate healing skin. And do not simply remove the jewellery, because taking it out of a partly healed piercing can trap the irritation inside or let the piercing close over a problem.

    What actually helps

    The real fix is almost always to remove the cause and give it time. Work out what is irritating the piercing and address it, whether that means being more careful not to knock it, changing your sleep position, or having your piercer check the fit of your jewellery. Keep up a simple, gentle saline routine as covered in the aftercare guide, no more and no less. Then be patient, because irritation bumps often take weeks to fade even after the cause is gone. Slow and steady wins here.

    The role of the right jewellery

    Two jewellery factors cause a lot of avoidable bumps. The first is material. A piercing healing against a reactive metal that contains nickel can stay grumpy no matter how careful you are, which is why nickel free implant grade titanium matters and why my guide on safe metals is worth a read. The second is size. Jewellery that is too long, too heavy or the wrong gauge keeps moving and tugging, and that constant motion is a classic bump trigger. The size guide helps you get the fit right.

    A lightweight nickel free titanium labret that sits kindly in a healing piercing

    When to see your piercer

    A reputable piercer would far rather you came in with a question than struggled alone, so do not be shy. See them if a bump is not improving after you have addressed the obvious causes, if you are unsure whether your jewellery fits, or if you simply want reassurance. See a doctor promptly if you have signs of infection such as spreading redness, heat, throbbing pain, fever or thick discharge. Getting eyes on a problem early is always easier than fixing a bigger one later.

    Preventing bumps in the first place

    Prevention is mostly about the boring basics done well. Choose a good piercer and quality implant grade jewellery from the start. Keep aftercare simple and consistent. Protect the piercing from knocks and pressure while it heals, especially at night. Do not change your jewellery until it is fully healed. And accept that healing takes months, so the patience you show early on is what spares you trouble later. Do these things and bumps become the exception rather than the rule.

    Above all, try not to let a small bump steal your excitement. They are a normal part of many piercing journeys, they are usually simple to resolve, and with a little care your piercing has every chance of settling into something you love.

    How long does a bump take to go?

    This is the hardest part to accept, because the honest answer is that it can take a while. Once you have removed whatever was irritating the piercing, an irritation bump often fades over several weeks, and sometimes a couple of months, rather than disappearing overnight. The bump usually shrinks gradually and quietly, and it is easy to feel discouraged in the middle of that slow progress. Try to judge success by the trend over weeks rather than day to day, because slow improvement is still improvement.

    The over cleaning trap

    It feels logical that if a piercing is unhappy you should clean it more, but the opposite is often true. Cleaning a piercing several times a day, or scrubbing at it, strips away the natural moisture the skin needs to heal and leaves it irritated and dry. Harsh products make this worse. The gentlest routine is usually the most effective one, which is a light saline clean once or twice a day and otherwise leaving the piercing alone. If in doubt, do less, not more.

    Sleep, the sneaky culprit

    A huge number of cartilage bumps are caused simply by sleeping on the piercing. Hours of pressure every night, often without you realising, keep a piercing inflamed and can bring up a bump that no amount of cleaning will shift while the pressure continues. If you can, sleep on the other side, and consider a travel pillow with a hole in the middle, which many people swear by for taking pressure off a healing ear. Fixing your sleep position alone resolves a surprising number of stubborn bumps.

    A quick myth buster

    A few pieces of popular advice do more harm than good. Twisting or rotating the jewellery is old guidance that only irritates a modern piercing, so leave it still. Undiluted tea tree oil and harsh disinfectants can burn healing skin and are best avoided. Homemade sea salt soaks are easy to mix too strong, which is why a correctly balanced sterile saline is the safer choice. And there is nothing to draw out or squeeze from an irritation bump, so please do not try. When in doubt, keep it simple and ask your piercer.

    When a bump is really a scar

    Occasionally what looks like a bump is actually scar tissue rather than simple irritation. A hypertrophic scar is a raised scar that forms right at the piercing and often improves slowly over many months once the irritation behind it is resolved. A keloid is rarer and larger, growing beyond the original site, and it is something to have looked at by a professional rather than treated at home. The important thing is not to attack either one with harsh remedies, as aggressive self treatment tends to inflame scars further. Gentle care and a professional opinion are the safe route.

    Give good jewellery a chance to help

    If a piercing has been stubborn despite careful aftercare, the jewellery itself is one of the first things worth reviewing. Switching from a reactive metal to nickel free implant grade titanium removes a very common source of ongoing irritation, and my guide on safe metals explains why the material matters so much. Having your piercer check that the size and length are right, and downsizing if your initial bar is now too long, removes another frequent cause. Fix the jewellery, keep the routine gentle, and give it time.

    Try to keep it all in perspective. A piercing bump is one of the most common things that happens on the way to a healed piercing, and the overwhelming majority settle with nothing more than a small change and a lot of patience. Address the cause, keep your routine gentle, wear body safe jewellery, and give it the weeks it needs. If you are ever unsure, a quick message to your piercer is always worth it.

    Trusted sources

    For independent guidance, the Association of Professional Piercers explains normal healing in their aftercare information, and if you suspect a metal reaction, DermNet covers nickel allergy. Their notes on appropriate jewellery can also help rule out a jewellery cause.

    Gemma

  • Threadless vs threaded: which is better for piercings?

    Threadless vs threaded: which is better for piercings?

    A threadless push in labret next to a threaded barbell showing the difference

    When you start shopping for piercing jewellery you quickly meet three words that describe how a piece is held together: threadless, internally threaded and externally threaded. It sounds like small print, but the fitting genuinely affects how comfortable your jewellery is, how easy it is to change, and how kind it is to a healing piercing. This guide explains the difference in plain language and explains why threadless is the usual pick for healing piercings.

    The fitting is simply the mechanism that keeps the decorative top attached to the bar that sits in your piercing. Get it right and changing your jewellery becomes quick and painless. Get it wrong and it can be fiddly at best and irritating at worst.

    The three fittings, quickly

    Threadless, also called push in. The top has a small flexible pin that pushes into a hollow bar and holds by tension. There is no screw thread at all. To secure it you give the pin a tiny bend, push it in, and it stays put.

    Internally threaded. The bar has a threaded hole, and the top has a matching screw that turns into it. The important detail is that the thread is on the top, so the part that passes through your piercing is smooth.

    Externally threaded. The screw thread is on the bar itself, which means the threaded section has to pass through your piercing every time you put it in. This is the least comfortable option, especially for fresh or sensitive piercings.

    How threadless actually works

    Threadless jewellery holds together by tension rather than a screw. The pin on the top is bent very slightly, then slotted into the hollow end of the bar. That gentle springiness is what keeps it in place. To remove it you simply pull the top straight out. Once you have done it once or twice it becomes second nature, and there is no tiny thread to line up or cross.

    A threadless titanium labret with a smooth bar that passes through the piercing

    Why the smooth bar matters for healing

    Here is the heart of it. With externally threaded jewellery, the screw thread runs along the bar, so every time you insert the piece those tiny ridges drag through your piercing. In a healed piercing that is merely annoying, but in a fresh or sensitive one it can scratch the delicate channel and set back your healing. Both threadless and internally threaded designs keep the bar smooth where it passes through you, which is far gentler. Threadless takes it one step further by removing the screw entirely.

    The everyday advantages of threadless

    Easy changes. Swapping a top takes seconds, with no fiddly screwing in a mirror. This makes restyling your ear genuinely enjoyable rather than a chore.

    Mix and match. Because tops and bars are separate, you can build a collection of decorative tops and move them between bars, getting far more looks from fewer pieces.

    Comfort. A smooth bar and a low profile fit sit nicely against the skin, whether it is a flat back labret in the lobe or a stud on the flat.

    Kinder to piercings. No thread dragging through the piercing on insertion means less irritation, which your healing skin will thank you for.

    A gold threadless top that can be swapped between bars

    Is there a learning curve?

    A little, and it is worth naming so it does not surprise you. The first time you handle a threadless top, the idea of bending the pin can feel strange. The trick is that you only need the smallest bend, just enough to create tension, and you push it into the bar with gentle, even pressure. To remove it you hold the bar steady and pull the top straight out. After a couple of goes it feels completely natural, and most people quickly prefer it to lining up a screw thread.

    Does threaded still have a place?

    Internally threaded jewellery is still a solid, secure choice and some people prefer the reassurance of a screw for certain placements or very active lifestyles. It is a perfectly good option. Externally threaded jewellery is the one I would steer you away from for anything going through your skin, simply because of that thread dragging through the piercing. If you only remember one rule, avoid externally threaded for fresh piercings.

    Why threadless is the usual pick

    Threadless brings together the things that matter most: comfort, easy restyling, and a design that is genuinely kind to healing piercings. Paired with nickel free implant grade ASTM F-136 titanium, it means your jewellery is safe to wear and a pleasure to change. To plan a look built around interchangeable tops, see my guide on building a curated ear, and if you are choosing sizes, the size guide covers gauge and length.

    How to insert a threadless top, step by step

    Start with clean hands and a clean piece, ideally over a soft surface so nothing bounces away if you drop it. Hold the decorative top and look at the little pin sticking out of the back. Give that pin the tiniest bend, just a few degrees, which is what creates the tension that holds everything together. Line the pin up with the hollow opening of the bar that is in your piercing, then push it gently and evenly straight in. You should feel it seat. Give the top a very light wiggle to confirm it is secure, and you are done.

    How to remove it

    Removal is even simpler. Hold the bar steady from behind with one hand so the whole piece does not turn in your piercing, and with the other hand pull the top straight out. Do not twist or unscrew it, because there is no thread to unscrew, and twisting can be uncomfortable. Straight out is all it takes.

    If it feels loose or keeps falling out

    If a top will not stay put, the pin has usually lost a little of its tension and just needs a touch more bend. Take the top out, add a very small amount of extra bend to the pin, and reinsert. Go gently and in tiny increments, because a little goes a long way and you can always add more.

    If it feels too tight or hard to insert

    The opposite problem means the pin is bent a little too much. Ease it back toward straight, just slightly, and try again. The aim is the smallest bend that holds securely, which keeps insertion smooth and protects the pin over time.

    Looking after the pin

    The pin is the one part that appreciates a gentle touch. Avoid bending it back and forth repeatedly for no reason, as any metal will tire if it is flexed too often. Handle your tops calmly, store them somewhere they will not get crushed, and they will keep their spring for a long time. Threadless jewellery is designed to be changed often, so this is about care, not fragility.

    Lovely for lobes, noses and beyond

    Threadless really shines for flat back labret styles in the lobe and on the flat, where the smooth flat disc sits comfortably against the skin, and for nostril piercings, where a low profile push in is both secure and easy to live with. Once you are used to the push in action, most people find they never want to go back to lining up a screw thread in a mirror again.

    The three fittings at a glance

    If you want the whole thing in a nutshell, here it is. Threadless, or push in, holds by tension with no screw, gives the smoothest bar and the easiest changes, and is the best pick for comfort and for healing piercings. Internally threaded has the screw on the top so the bar that passes through you stays smooth, which makes it a secure and perfectly good option that some people prefer. Externally threaded has the screw on the bar, so the thread drags through the piercing on every insertion, and it is the one to avoid for anything going through your skin, particularly while it is healing. Remember those three and you can shop any jewellery site with confidence.

    Security for an active life

    A question that comes up often is whether threadless jewellery stays put during sport, sleep and everyday knocks. The honest answer is that when the pin tension is set correctly it is very secure, and most people wear it through all of normal life without a second thought. If you are especially active, it is worth a quick habit of pressing gently on your tops now and then to check they are seated, just as you might check a stud earring. And if you ever want maximum reassurance for a particular placement, an internally threaded piece is always there as an alternative, with the same smooth bar through the piercing.

    The best endorsement of threadless is that once people get used to it, changing jewellery stops feeling like a task and starts feeling like play. Being able to restyle an ear in a few minutes, with no thread to fight, is exactly the kind of small pleasure that makes a collection worth building. Give it a couple of goes and I think you will be won over too.

    Trusted sources

    The Association of Professional Piercers covers safe jewellery styles and fittings for fresh piercings, and their aftercare guidance is worth a read while your piercing heals.

    Gemma

  • How to know your jewellery is genuinely nickel-free

    How to know your jewellery is genuinely nickel-free

    Nickel free implant grade titanium jewellery laid out on a neutral background

    If metal jewellery has ever left your skin red, itchy or sore, there is a good chance nickel was the culprit. Nickel allergy is one of the most common skin allergies in the world, and piercings are one of the most common ways people discover they have it. The frustrating part is that the jewellery market is full of vague and misleading claims, so knowing that a piece is genuinely free of nickel is harder than it should be. This guide explains what to look for, what to avoid, and how to shop with real confidence.

    The short version is that words like hypoallergenic and nickel free are not tightly regulated, so they are not a guarantee on their own. What actually protects you is the material itself and being able to point to a recognised standard. Let us unpack that.

    Why nickel causes so much trouble

    Nickel is a metal that many people are sensitised to, meaning their immune system reacts to it on contact. In a piercing, that reaction can show up as itching, redness, a rash, weeping, or a piercing that simply refuses to settle no matter how careful your aftercare is. Because a piercing keeps the metal in constant contact with broken skin, it is a particularly easy way to trigger a reaction, and repeated exposure can make a sensitivity worse over time.

    You can develop a nickel allergy at any point in life, even if cheaper jewellery never bothered you before. That is one reason it is worth choosing safe materials from the start rather than waiting for a problem.

    The marketing traps to watch for

    Hypoallergenic sounds reassuring but has no strict legal definition in jewellery. It suggests a lower chance of reaction, not a guarantee, and anyone can print it on a label.

    Surgical steel is the big one. It sounds clinical and safe, and it is a perfectly good material for many uses, but most surgical stainless steel actually contains nickel. In a sealed healed piercing many people tolerate it, but it is not truly nickel free, and for sensitive skin or fresh piercings it can be a problem.

    Gold plated pieces are only as safe as the metal underneath the plating. Thin plating over a cheap base metal such as brass will wear through, and once it does your skin meets whatever is beneath. The finish tells you nothing about the core.

    A silver finish implant grade titanium labret stud

    What actually counts: implant grade materials

    The gold standard, no pun intended, is implant grade material backed by a recognised specification. For titanium body jewellery, that specification is ASTM F-136. It refers to a titanium alloy that was developed to be placed inside the human body, in the way surgical implants are, which is about as demanding a test of biocompatibility as exists.

    Implant grade ASTM F-136 titanium is the go-to precisely because it is nickel free and body safe. It is light, strong, holds a beautiful gold or silver finish, and is the kind of material a good piercer will want to put in a fresh piercing. If you would like the full comparison against steel and sterling silver, read my guide on what is actually safe for a piercing.

    How to check before you buy

    A trustworthy seller will tell you exactly what a piece is made of, not just what colour it is. Look for a clear statement of the material and, ideally, the standard it meets, such as implant grade ASTM F-136 titanium. Reputable suppliers can often provide mill certificates, which are documents from the metal supplier confirming the alloy. If a listing only says surgical steel, alloy, or simply does not say, treat that as a reason to ask questions or walk away.

    Be especially careful with very cheap jewellery sold in large multipacks, as the low price often comes from unspecified base metals that are far more likely to contain nickel.

    A gold zircon clicker made from nickel free titanium

    Home testing exists, if you want certainty

    If you already own pieces you are unsure about, nickel spot test kits are available fairly cheaply. They use a swab and a solution that changes colour when nickel is present. They are not perfect and they will not tell you the grade of a metal, but they can flag an obvious nickel problem in something you already have. For anything going into a fresh piercing, though, it is far better to start with a material you can trust than to test your way out of a reaction.

    What to ask, in one sentence

    If you remember nothing else, remember this question to ask any seller: what exactly is this made from, and does it meet an implant grade standard? A confident, specific answer is a very good sign. A vague one tells you plenty too.

    What an honest listing looks like

    A trustworthy seller describes the material on every listing, names the standard, and answers questions about it directly. If you have reacted to jewellery in the past, ask before you order: how they answer tells you a lot. You can also plan a full safe collection with my curated ear guide.

    Signs you might be reacting to nickel

    A nickel reaction tends to look like itchy, red, sometimes flaky or weepy skin right around where the metal touches. With a piercing, the classic picture is a piercing that will not settle no matter how careful your aftercare is, often with an itchy redness that eases when the jewellery is out and returns when it goes back in. This is different from a straightforward infection, which is usually more painful, hot and accompanied by thick discharge. If a piercing has been grumpy for weeks and your aftercare is spot on, the metal is worth suspecting.

    Other genuinely safe materials

    Implant grade titanium is the usual first choice, but it is not the only safe option worth knowing about. Niobium is another body friendly metal that many sensitive people tolerate well. Solid high karat gold can be a lovely choice for healed piercings, with some caveats I cover below. Certain inert glass is used in some jewellery too. The common thread is that safe materials are specific and named, whereas risky ones hide behind vague words. If a seller can tell you exactly what a piece is and point to a standard, that is a good sign.

    What about solid gold

    Solid gold is not automatically nickel free, because pure gold is too soft to use on its own and is always mixed with other metals to make an alloy. What matters is which metals, and the karat. Lower karat golds contain more of those other metals, and some white gold alloys in particular have historically used nickel. Reputable body jewellery made in higher karat, nickel free gold alloy can be beautiful and safe for healed piercings, but the label solid gold on its own does not guarantee anything. As always, ask what the alloy is.

    Nickel is more common than you think

    Part of why nickel allergy is so widespread is that we are exposed to it constantly, in cheap earrings, belt buckles, jean buttons, watch cases, coins and phone bodies. Every exposure can nudge a sensitive immune system further along, which is how someone who wore cheap jewellery happily for years can suddenly start reacting. Choosing genuinely nickel free materials for the jewellery that sits in your skin around the clock is one of the kindest things you can do for your body, especially if you already know you are sensitive.

    Fresh piercings are the strictest test

    A useful way to think about all of this is that a healed, sealed piercing is far more forgiving than a fresh one. Once skin has fully closed around a piercing, many people can wear materials that would irritate an open wound, which is why someone might tolerate a pair of cheaper earrings in long healed lobes yet react badly to the same metal in a fresh piercing. The moment that matters most, then, is the beginning. Healing with a genuinely nickel free implant grade material gives the piercing the calm start it needs, and it means you are not gambling your healing on a vague label.

    A simple rule for shopping online

    When you cannot hold a piece or ask a shop assistant, one rule keeps you safe. If a listing does not clearly state the material and, ideally, an implant grade standard, treat it as unsuitable for a fresh or sensitive piercing until proven otherwise. Good sellers are proud of their materials and say so plainly. Silence or vagueness is information in itself. It costs nothing to message a seller and ask the direct question, and how they answer tells you whether to trust them with your skin.

    None of this is about being anxious every time you buy a piece of jewellery. It is simply about knowing the right question and recognising a straight answer. Once you get into the habit of choosing implant grade materials, shopping becomes calmer, not more stressful, because you can enjoy the pretty part knowing the safe part is already handled.

    Trusted sources

    For deeper reading, DermNet explains nickel allergy and contact dermatitis in detail, and the Association of Professional Piercers lists the implant grade materials, including ASTM F-136 titanium, that are safe for piercings.

    Gemma

  • Your first piercing: what to expect while it heals

    Your first piercing: what to expect while it heals

    A freshly pierced ear healing with a simple titanium stud

    Getting your first piercing is exciting, and it is completely normal to feel a little nervous about the part that comes afterward. Most of the worry people carry is simply not knowing what is normal. This guide takes you through the whole journey, from choosing where to go, to what the first few weeks feel like, to knowing the difference between healthy healing and a sign that something needs attention. Read it once and you will feel far more prepared.

    Everyone heals at their own pace, and this is general guidance rather than medical advice, so always follow the aftercare your own piercer gives you and see a professional if you are worried. With that said, here is what to expect.

    Start by choosing a good piercer

    Where you get pierced matters more than almost anything else. Look for a clean, professional studio that uses a single use sterile needle rather than a piercing gun. Guns cannot be properly sterilised and they use blunt force rather than a clean cut, which is harder on the tissue. A good piercer will talk to you about placement, check your anatomy, and use implant grade jewellery from the start.

    It is worth travelling a little further or paying a little more for someone reputable. A well done piercing with good initial jewellery heals more smoothly and saves you trouble down the track.

    What happens on the day

    Your piercer will clean the area, mark the spot and check you are happy with the placement before anything else. The piercing itself is quick. Most people find the actual moment is over faster than they expected, with a short sharp sensation and then it is done. You may feel warm or a little lightheaded afterward, which is a normal response, so take your time before you stand up.

    A healed and styled ear showing what a first piercing can grow into

    Your first jewellery: why the metal matters

    The jewellery you heal with is not the place to cut corners. A fresh piercing is an open wound, and it will be in close contact with that metal around the clock for months. This is why implant grade materials matter so much. Implant grade ASTM F-136 titanium is nickel free and designed to sit safely in the body, so it gives a new piercing the best possible chance to settle. If you want to understand why some metals cause reactions and others do not, my guide on safe metals goes deeper.

    Your piercer will usually fit a slightly longer bar at first to allow for swelling. Once things calm down you can have it downsized to a neater length.

    The first few weeks, and what is normal

    In the early days it is completely normal to see some redness around the piercing, a little swelling, some tenderness, and a light crust of dried fluid on the jewellery. That crust is just part of healing. What you are hoping to avoid is heat, a lot of swelling that gets worse rather than better, thick coloured discharge, or pain that increases over time instead of easing.

    A useful rule of thumb is direction of travel. Fresh piercings should trend toward feeling better week by week. A brief flare after a knock or a rough night of sleep is normal, but a steady worsening is worth a conversation with your piercer.

    Your aftercare routine

    Aftercare is refreshingly simple, and simpler is genuinely better. The core of it is gently cleaning the piercing with a sterile saline solution once or twice a day, and otherwise leaving it alone. The aftercare guide sets out the full routine step by step, but the short version is clean hands, saline, and patience.

    What not to do

    The mistakes that cause the most trouble are all avoidable. Do not twist or spin the jewellery, which is old advice that does more harm than good. Do not touch or play with the piercing with unwashed hands. Do not change the jewellery before it has healed, however tempting a new top might be. Try not to sleep on a fresh ear piercing, and keep hair products, makeup and swimming pools away from it while it settles.

    Healing takes longer than people expect

    Lobe piercings often feel settled within a couple of months, but cartilage piercings such as helix, conch and rook can take many months to fully heal, sometimes the better part of a year, even when they look fine on the surface. This is normal. The outside heals before the inside does, which is why changing jewellery too early can set you back. Give it time.

    A gold threadless stud, a lovely first change once a piercing has healed

    Choosing your first real pieces

    Once your piercer confirms your piercing has healed, the fun part begins. With threadless, interchangeable tops, your first proper piece can be the start of a collection you build and restyle over time, all in the same safe titanium you healed in. When you are ready to plan a full look, my guide on building a curated ear will help. And if you have any questions along the way, ask your piercer, because no question about your own healing is ever too small.

    How much does it actually hurt

    This is the question everyone wants answered honestly, so here it is. For most people a piercing is a brief, sharp sensation that is over in a second or two, followed by a warm throb that eases fairly quickly. Lobes are generally very manageable and are a gentle place to start. Cartilage piercings such as helix or conch tend to feel a bit more intense and can be tender for longer afterward, simply because cartilage is firmer tissue. The anticipation is usually worse than the moment itself, and a calm, experienced piercer makes a real difference to how the whole thing feels.

    Everyday life while it heals

    You can carry on with normal life, with a few sensible adjustments. Showering is fine, and letting clean water run over the piercing is good. Avoid swimming pools, spas, lakes and the ocean while it is healing, because that water can introduce bacteria. Be gentle with hair brushing, hats and headphones around a new ear piercing, and keep makeup, fake tan and hair products off the area. Change your pillowcase often, and keep your phone screen clean if you hold it to a pierced ear.

    Sleep is the one that catches people out. If you have pierced one side, try to sleep on the other so you are not pressing on a fresh piercing all night. A travel pillow with a hole in the middle is a popular trick for cartilage piercings that need pressure kept off them.

    Bumps happen, and usually settle

    It is very common for a cartilage piercing to develop a small bump at some point during healing. Most of these are irritation bumps, often caused by a knock, sleeping on it, or jewellery that is catching, rather than an infection. The worst thing you can do is pick at it or panic and change the jewellery. Keep up your gentle saline routine, remove whatever is irritating it if you can identify it, and check in with your piercer, who can tell you whether it is a simple irritation bump or something that needs a different approach. Genuine infections are less common than people fear, but heat, spreading redness, throbbing pain and thick discharge are the signs that warrant prompt professional advice.

    When can you change it or take it out

    Patience really is everything here. Do not change the jewellery until your piercer confirms the piercing has healed, because swapping too early reopens the wound and invites problems. And remember that a healed piercing, especially in cartilage, can still shrink or close surprisingly fast if you leave the jewellery out for long, so if you love a piercing, keep something in it. When you are cleared to change, that is the moment your collection begins.

    A realistic healing timeline

    Timelines vary from person to person, but some general expectations help set your patience correctly. A lobe often feels comfortable within six to eight weeks, though it is still maturing underneath for a while after that. A helix or other outer cartilage piercing commonly takes somewhere in the range of three to six months and sometimes longer. Inner placements such as a conch, rook or industrial can take from six months to a year to fully settle. The surface always looks healed well before the inside is finished, which is the single biggest reason people run into trouble by rushing. Let your piercer, not the calendar, tell you when a piercing is truly ready.

    The downsizing appointment

    One appointment worth planning for is downsizing. Because your piercer fits a longer bar at first to allow for swelling, that bar becomes too long once the swelling goes down, leaving the jewellery to move around more than it should and sometimes causing bumps. A short visit to swap it for a correctly fitted length, usually after the first few weeks to couple of months, makes the piercing more comfortable and helps it finish healing neatly. Think of it as a normal part of the process rather than an optional extra.

    Trusted sources

    Two trusted resources are well worth bookmarking as you heal: the Association of Professional Piercers on piercing aftercare and on appropriate initial jewellery.

    Gemma

  • A guide to ear piercing placements

    A guide to ear piercing placements

    A curated ear showing helix, lobe, flat and conch piercings

    The ear is a surprisingly large canvas. Between the soft lobe and the folds of cartilage at the top, there are more than a dozen recognised piercing placements, each with its own character, its own healing pattern and its own best styles of jewellery. Knowing the map makes everything easier, whether you are planning your very first piercing or dreaming up a full curated ear. This guide walks around the ear placement by placement, in plain language, so you can talk to your piercer with confidence.

    One thing to hold in mind throughout: not every placement suits every ear. Your individual anatomy decides what will sit well and heal happily, so treat this as a tour of the possibilities rather than a checklist to complete. A good piercer will look at your ear and tell you honestly which of these will work for you.

    Ear piercing placement diagram A labelled diagram of an ear showing ten common piercing placements: lobe, upper lobe, tragus, anti-tragus, daith, conch, rook, flat, forward helix and helix. Forward helix Daith Tragus Upper lobe Lobe HelixFlatRook ConchAnti-tragus
    The ten placements covered in this guide. Every spot has its own gauge, jewellery style and healing time.

    Lobe piercings

    The lobe is the soft lower part of the ear and the friendliest place to start. It pierces easily, heals relatively quickly, and happily holds studs, hoops and dangles. Most people begin with a single standard lobe piercing, then build from there. Stacked lobes, where two or three piercings climb up the lobe, are a lovely way to layer jewellery, and upper lobe piercings sit just above the main lobe for a little more height. Because lobes heal well and take most jewellery styles, they are the natural home for your anchor pieces.

    Helix piercings

    The helix is the outer rim of cartilage that curves around the top of the ear. It is one of the most popular and most flexible cartilage placements, suiting small studs and delicate hoops alike. You will also hear about the forward helix, which sits at the front of the ear near the face, and about double or triple helix piercings, where two or three sit in a neat row. Helix piercings are cartilage, so they take longer to heal than lobes and reward patience.

    Diagram showing gauge, length and diameter for placing jewellery correctly

    The flat

    The flat is exactly what it sounds like, the flatter expanse of cartilage inside the upper rim of the ear. It is a wonderful spot for a single statement stud or a small cluster, because the flat surface gives a piece a clean backdrop to shine against. Flat piercings are a favourite for showing off a sparkling top, and they pair beautifully with helix piercings above them.

    The conch

    The conch is the large, shell like bowl in the middle of the ear, and it takes its name from the seashell. It suits two very different looks. A bold stud in the conch sits like a centrepiece, while a large ring through the conch wraps around and frames the whole inner ear. The conch is a roomy placement with lots of styling potential, and it is a favourite anchor point for a busy curated ear.

    The tragus and anti-tragus

    The tragus is the small nub of cartilage that sits just in front of the ear canal, and a tiny stud here adds a delicate point of sparkle close to the face. Opposite it, the anti-tragus is the little ridge above the earlobe, a smaller and slightly trickier spot that suits small curved jewellery. Both are cartilage placements and both depend heavily on your anatomy, so a piercer will check whether you have enough of a ridge to take them.

    Rook, daith and snug

    These three sit in the inner folds of the ear and add real depth to a stack. The rook is the fold of cartilage in the upper inner ear and suits curved barbells and small hoops. The daith is the innermost fold, often worn with a pretty ring that peeks out from the centre of the ear. The snug, also called the anti helix, runs along an inner ridge and is one of the more anatomy dependent placements. Because they are tucked into cartilage, all three heal slowly and like to be left alone.

    A gold clicker ring, a popular style for conch and daith piercings

    The industrial

    An industrial piercing is a single straight barbell that connects two separate cartilage piercings, usually across the upper ear. It makes a striking, architectural statement, but it asks a lot of your anatomy and your patience, as two cartilage piercings must heal while joined by one bar. It is a commitment piece, and worth a careful conversation with an experienced piercer.

    Which placements will suit you

    The honest answer is that your ear decides. The curve of your helix, the depth of your conch, the size of your lobe and the presence of a tragus ridge all determine what can be pierced and what will heal well. This is why copying someone else photo for photo rarely works. Use this guide to learn the language and gather ideas, then let a good piercer map the possibilities onto your own ear.

    Healing varies by placement

    As a rule, lobes heal fastest, often feeling settled within a couple of months, while cartilage placements such as helix, conch, rook and daith can take many months to a year to fully heal even when they look fine on the surface. Planning a full ear is therefore a project measured in seasons, not days, and that is part of the pleasure. Pierce in stages, let each one calm down, and enjoy planning the next.

    Getting the jewellery right

    Each placement has styles that suit it best, but two things matter everywhere: the size and the material. The gauge and length or diameter must match the piercing so the piece sits securely, which the size guide explains, and the metal must be genuinely body safe, which is why nickel free implant grade titanium matters, as covered in my guide on safe metals. When you are ready to design a whole look across several placements, my other guides on building a curated ear and choosing jewellery will help you pull it together.

    Wherever you are on your ear journey, from a first lobe to a full stack, the map above is yours to play with. Take your time, listen to your piercer, and let your ear become a little collection that is entirely your own.

    Orbital and connected piercings

    Beyond the single placements, some piercings are designed to work together. An orbital is two piercings joined by a single ring that passes through both, often worn in the lobe or the helix, and it creates a neat, closed loop that looks more intricate than it is to wear. Connected looks like these, and the industrial mentioned earlier, ask a bit more of your healing because two channels settle at once, but they add real character to an ear once they are established. They are worth considering only once you are comfortable caring for simpler piercings first.

    Do your ears have to match?

    There is no rule that says your two ears must mirror each other. Some people love perfect symmetry, with the same placements on both sides, while others deliberately build one statement ear and keep the other minimal, or let each ear tell a slightly different story. Both approaches are valid, and asymmetry can look wonderfully modern. Think about how you wear your hair too, since a side you often tuck back will show more than one you usually cover, and you may want to concentrate your favourite pieces there.

    A gentle order for first timers

    If you are just starting out and dreaming of a fuller ear, it helps to build in a sensible order rather than all at once. Lobes are the kindest place to begin, healing quickly and letting you get used to aftercare. From there, an outer helix is a popular next step. Inner cartilage placements such as the conch, rook and daith are best added once you are confident with healing and happy to be patient, since they take the longest. Building this way keeps the process enjoyable rather than overwhelming.

    Making the most of your piercer

    Your piercer is the single best resource you have, so use them well. Bring a few inspiration images for the general feeling you are after, then ask them honestly what your anatomy can take and in what order they would recommend building. A good piercer will happily map out a plan across several visits, telling you which placements will suit you and which to skip. That conversation, more than any guide, is what turns a wish list into a beautiful ear that actually heals.

    Aftercare changes with the placement

    It is worth knowing that different placements ask for slightly different patience, even though the basic routine is the same everywhere. A lobe will often feel settled while a helix on the same ear is still quietly healing underneath, and inner cartilage such as the conch or rook takes the longest of all. The care itself stays simple, a gentle sterile saline clean once or twice a day and otherwise hands off, as set out in the aftercare guide. What changes is how long you keep it up, so let the slowest piercing set your timeline rather than the quickest.

    Let your ear grow with you

    A curated ear is rarely finished in one sitting, and that is a feature rather than a flaw. With threadless, interchangeable tops, you can add and restyle pieces over months and years, letting the ear evolve with your taste and your budget. Start with the placements that suit you and heal easily, then add the more adventurous ones as you grow confident. When you are ready to plan the whole look, my curated ear and styling guides pull all of this together.

    Trusted sources

    For trusted, independent advice, see the Association of Professional Piercers on appropriate jewellery and on aftercare as you plan and heal your piercings.

    Gemma

  • Gauges explained: 16g, 18g and why the number matters

    Gauges explained: 16g, 18g and why the number matters

    Close up of threadless titanium studs showing bar thickness

    Gauge is one of those piercing words that sounds technical and slightly intimidating, and then turns out to be simple once someone explains it. It is easily the most common thing people get wrong when they buy jewellery online, because the number behaves in a way that feels backwards. This guide walks through exactly what gauge means, why the number matters so much for comfort and healing, and how to make sure the pieces you order will actually fit.

    If you take one thing from this guide, let it be this: never guess your gauge. A piece in the wrong gauge will not sit right no matter how beautiful it is, and in a fresh piercing it can cause real problems. By the end you will know how to find your gauge and how to shop with confidence.

    What gauge actually measures

    Gauge is simply the thickness of the bar or wire that goes through your piercing. It is not the length, and it is not the size of the decorative top. It is how thick the post is. Gauge is written with a number followed by the letter g, for example 18g or 16g.

    Here is the part that trips everyone up. The higher the number, the thinner the bar. So 20g is thinner than 18g, and 18g is thinner than 16g. The scale runs backwards because it comes from an old wire manufacturing system where the number counted how many times the wire had been drawn through a machine to make it thinner. You do not need to remember the history, only the rule: bigger number means thinner bar.

    The gauges you will actually meet

    20g is very thin and is most often seen in some nostril piercings and in delicate fashion earrings. It is on the fine end for body jewellery.

    18g is a common thickness for healed lobe piercings and many nostril piercings. It is dainty without being fragile.

    16g is the workhorse of the piercing world. A large share of cartilage piercings such as helix, conch, tragus, rook and daith are done at 16g, and many people wear 16g in their lobes too. If you are unsure, 16g is the most likely answer for a cartilage piece.

    14g is thicker again and is common for navel piercings, some conch and industrial piercings, and anywhere a slightly sturdier bar is wanted.

    Why matching your gauge matters so much

    Your piercing was made at a specific gauge, and the hole heals to that thickness. When your jewellery matches, the bar fills the channel neatly and sits secure. When it does not match, things go wrong in two different directions.

    If the bar is too thin for the hole, the jewellery can move around, sink, migrate or snag, and a healing piercing may be irritated by the constant wobble. If the bar is too thick, you cannot comfortably fit it through the piercing at all, and forcing a thicker bar into a smaller hole is a fast route to trauma and swelling. Neither is worth risking for the sake of a piece you liked the look of.

    Diagram showing gauge, length and diameter on a labret stud and a ring

    Gauge, length and diameter are three different things

    People often mix these up, so it helps to separate them. Gauge is the thickness of the bar. Length is how long a straight post is, which decides how snug a labret stud sits against your skin. Diameter is the width across a ring or hoop. You need all three to be right for a piece to sit well, and the size guide walks through each one with a diagram so you can measure and order correctly.

    A quick example. Two labret studs can both be 16g, but if one is 6mm long and the other is 8mm long they will sit very differently, one flush to the skin and one with a little more room. Gauge gets you the right thickness, length and diameter get you the right fit.

    Cartilage and lobe are not always the same

    It is common to have lobes pierced at 18g or 16g and cartilage at 16g, but there is no single universal answer, because it depends on how you were originally pierced. This is exactly why guessing is risky. The safest move is to check rather than assume, especially if different piercings on the same ear were done at different studios over the years.

    How to find your gauge

    The most reliable way is to ask the piercer who did the piercing, as they will know the gauge they used. If that is not an option, a reputable piercer can measure your existing jewellery or your piercing for you, usually in a couple of minutes. Some people measure a current piece of jewellery at home with a gauge wheel, but if you are new to this, a quick visit to a studio removes all doubt.

    Please do not try to judge gauge by eye from a photo on the internet. The difference between 18g and 16g is small to look at but very real in your piercing.

    Gold threadless zircon labret stud shown at the correct gauge

    A note on downsizing

    When you are first pierced, your piercer usually fits a slightly longer bar to leave room for swelling. Once the initial swelling settles, often after a few weeks to a couple of months, it is worth going back to have that bar downsized to a shorter length. This is about length rather than gauge, but it matters for the same reason: jewellery that fits the piercing as it actually is will always be more comfortable and heal more happily than jewellery that is the wrong size.

    Before you buy

    Whoever you buy from, look for a listing that names the metal standard (ASTM F-136 or ASTM F-67 titanium), states the gauge and length or diameter, and says plainly whether any gold colour is PVD or plating. If a seller cannot tell you, buy somewhere else. My guide to checking jewellery is genuinely nickel-free walks through what to look for, and the size guide covers the measurements.

    What happens when the gauge is wrong

    It helps to picture the two failure modes. If the bar is too thin for the hole, the jewellery has room to move, and in a healing cartilage piercing that constant movement can encourage the piercing to migrate, meaning it slowly shifts position, or in a worse case to reject and grow out altogether. Too thin can also let a heavy top hang and drag. If the bar is too thick, you simply cannot pass it through the piercing without forcing it, and forcing is how you get swelling, bleeding and a very unhappy piercing. Neither is a small cosmetic issue, which is why matching the gauge is worth the small effort of checking.

    Gauge is not the same as stretching

    There is a separate world of deliberately stretched piercings, where a lobe is gradually taken up through the gauges over months to hold larger jewellery. That is a slow, intentional process done in small steps with proper care. It is completely different from choosing the right gauge for a standard piercing, and the two should not be confused. If you simply want jewellery that fits the piercing you already have, you are matching your existing gauge, not stretching it. Never try to force a larger gauge into a standard piercing to get there faster, as that is exactly how tissue gets damaged.

    A quick starting reference

    As a rough guide to orient yourself, healed lobes are commonly 18g or 16g, the majority of cartilage piercings such as helix, tragus, conch and rook are 16g, and navel piercings are often 14g. Please treat this as a starting point for conversation rather than a rule, because the only number that matters is the one your piercing was actually made at. When a listing shows a gauge, that is the thickness of that exact piece, so you can match it to what you know you wear.

    A few common questions

    Can I put a slightly thinner bar in to make it fit more easily? Better not, because the looseness that makes it easy to insert is the same looseness that causes movement and irritation. Can I file or force a thicker bar through? No, and it is not worth the damage. Does gauge really affect healing, or just fit? It affects both, because a secure, correctly sized bar sits calmly in the piercing and lets it settle, while the wrong gauge keeps disturbing it. When in doubt, the answer is always to check with your piercer rather than to guess and hope.

    Measuring at home, if you want to

    If visiting a studio is not practical, you can get a reasonable idea at home. A gauge wheel is an inexpensive tool with slots cut to standard gauges, and you slide a piece of jewellery into the slot it fits to read off the number. A digital calliper works too, measuring the bar thickness in millimetres, which you then match to a gauge, for example 1.2mm is 16g and 1.0mm is 18g. These are useful for identifying jewellery you already own. For a piercing itself, though, a piercer remains the most reliable source, because they can see how the piece sits in the channel rather than just its dimensions.

    Whichever way you arrive at your number, once you know it, buying gets much easier: check the gauge is stated on the listing, and the size guide explains how gauge, length and diameter work together. Get those three right and your jewellery will feel like it was made for you, because in a sense it was.

    Trusted sources

    For more on choosing safe, correctly sized pieces, the Association of Professional Piercers has a useful guide to jewellery for initial piercings, and their aftercare advice covers downsizing as a piercing heals.

    Gemma

  • How to build a curated ear

    How to build a curated ear

    A curated ear with a mix of studs, hoops and clickers

    A curated ear is one of those things that looks effortless and is anything but. When it is done well, every piece feels like it belongs, the metals talk to each other, and the whole ear reads as one considered look rather than a handful of piercings that happened over the years. The good news is that you do not need a stylist or a huge collection to get there. You need a little planning, the right sizes, and jewellery that is safe to wear long term.

    This is my full guide to building a curated ear from scratch, or bringing an ear you already have into something more intentional. I will cover the anatomy, how to choose an anchor piece, the quiet rules that make a cluster look considered, how to mix metals without it looking accidental, and how to get sizing right so nothing sits wrong. Take what is useful and leave the rest, because the whole point of a curated ear is that it looks like you.

    What a curated ear actually means

    A curated ear, sometimes called an ear stack or an earscape, is a deliberate arrangement of several piercings styled to work together. The word that matters is deliberate. It is not about having the most piercings, and it is definitely not about filling every possible hole. Some of the most striking ears have five or six pieces with plenty of bare skin between them. Others are dense and layered. Both can be beautiful, and both come down to the same thing: choices made on purpose.

    Curation happens on two levels. The first is placement, meaning where the piercings sit and how they lead your eye up and around the ear. The second is the jewellery itself, meaning the metals, the finishes, the sizes and the little details like whether a piece sits flat and close to the skin or hangs with movement. When both levels agree, the ear looks finished.

    Start with your ear, not a screenshot

    It is tempting to save a photo of someone elses ear and try to copy it piercing for piercing. The problem is that every ear is shaped differently. The curve of your helix, the size of your lobe, the fold of your conch and the space you have on your flat are all yours, and they decide what will actually suit you and heal well. A layout that looks incredible on one person can sit awkwardly on another simply because the anatomy is different.

    A good piercer will look at your ear and tell you honestly what your anatomy can and cannot take. Listen to them. If they say a particular piercing will not heal well for you, that is worth far more than matching a picture. Use inspiration images for the feeling you are after, the density, the metal mix, the general mood, and let your own ear decide the specifics.

    Diagram showing gauge, length and diameter on piercing jewellery

    A quick map of ear piercings

    You do not need to memorise every name, but knowing the main spots helps you plan and helps you talk to your piercer. Working roughly from the bottom of the ear upward, here are the placements you will hear about most.

    Lobe. The soft lower part of the ear. Easy to pierce, quick to heal, and the natural home for your anchor pieces and any dangles. Many people stack two or three lobe piercings here.

    Helix. The outer upper rim. A classic spot for small studs and delicate hoops, and one of the most flexible placements for building height into a stack.

    Flat. The flat area of cartilage inside the upper rim. Perfect for a single statement stud or a small cluster, because it gives a flat piece a clean backdrop.

    Conch. The large bowl in the middle of the ear. It suits both a bold stud and a large ring that frames the whole ear.

    Tragus. The little nub in front of the ear canal. A tiny stud here adds a lovely point of interest near the face.

    Rook and daith. Folds of cartilage in the inner ear that suit curved jewellery and small hoops, and add depth to a busier stack.

    You do not need all of these. Most curated ears are built from the lobe, a couple of helix points, and one cartilage feature like a flat or a conch.

    Choose your anchor piece first

    Every good stack has an anchor, one piece that is a little bolder or brighter than the rest, that the eye lands on first. Everything else is chosen to support it. Your anchor might be a zircon cluster on the lobe, a statement clicker on the conch, or a single sparkling stud on the flat. Pick this first, then build outward with quieter pieces so the anchor keeps its moment.

    Gold zircon segment clicker by Willow and Thorn

    A common mistake is choosing several loud pieces and letting them fight for attention. If everything sparkles at maximum volume, nothing stands out and the ear can look busy rather than curated. One clear hero, supported by smaller companions, almost always reads as more considered and more expensive.

    The quiet rules: odd numbers and negative space

    Two design ideas do a lot of heavy lifting. The first is odd numbers. Groups of three or five tend to look more natural and balanced to the eye than groups of two or four. If you are clustering studs on the flat or stacking the lobe, try landing on an odd count.

    The second is negative space, which is just a nice way of saying bare skin. Resist the urge to fill every gap. The spaces between pieces are what let each one breathe and what stop a stack from looking cluttered. Think of it like styling a shelf, where the empty room around an object is part of why it looks good.

    Mixing metals and colours

    You are allowed to mix silver and gold tones. In fact a deliberate mix often looks more modern and more personal than a single metal throughout. The trick is to make the mix look intentional. Repeat each tone at least twice so it reads as a choice, for example two gold pieces and three silver, rather than one lonely gold stud among silver that looks like it was left in by accident.

    Just as important as the colour is the material underneath it. For piercings, especially healing ones, the metal needs to be genuinely body safe. Implant grade ASTM F-136 titanium is nickel free and holds a gold finish beautifully, so you can mix tones without mixing in irritation. If you want the full picture on which metals are actually safe and which to avoid, read my guide on titanium versus surgical steel versus sterling silver.

    Getting the size right

    Nothing undoes a beautiful stack faster than the wrong size. Two numbers matter. Gauge is the thickness of the bar, and it needs to match the piercing so the jewellery sits securely without stretching or wobbling in the hole. Length or diameter is how the piece sits, whether a labret is snug to the skin or a hoop is the right size to frame the piercing.

    Gold threadless zircon labret stud by Willow and Thorn

    If you are not sure of your sizes, your piercer can tell you, and the size guide walks through gauge, length and diameter with a diagram so you can order with confidence. When in doubt, ask before you buy rather than guessing, because a piece that is the wrong gauge will never sit right no matter how lovely it is.

    Why threadless makes curation easy

    Threadless jewellery, also called push in, is the easiest to build with. The top simply pushes into the bar and holds by tension, with no tiny screw thread to line up. For a curated ear this matters more than it sounds. Threadless tops are quick to change, which means you can swap a stud for a sparkle or restyle a whole cluster in minutes, and you can mix and match tops and bars to get exactly the look you want. If you want to understand the difference, my guide on threadless versus threaded jewellery explains the difference.

    Give every piercing time to heal

    A curated ear is built over months, not in a single afternoon, and that is a feature rather than a limitation. Cartilage piercings in particular can take many months to settle, and rushing to add the next piece or to change jewellery too soon is the fastest way to end up with irritation instead of a stack. Pierce in stages, let each one calm down, and enjoy planning the next addition.

    While things heal, keep aftercare simple and consistent. The aftercare guide covers the saline routine, what is normal, and what is worth a check with your piercer. Patience really is the secret ingredient here.

    How to build yours

    When you are ready to start choosing pieces, think in layers. Begin with your anchor, add a couple of supporting studs in a mix of your two chosen tones, then finish with a hoop or a clicker for movement. With interchangeable tops, you can grow your collection one piece at a time and restyle whenever the mood takes you, all in nickel free implant grade titanium that is safe to wear day in and day out.

    If you would like a hand planning a look for your specific ear, message me on Instagram at @willowandthornjewels and tell me what you are working with. There is no such thing as a silly question when it comes to your own ear.

    Trusted sources

    For independent guidance as you build your ear, the Association of Professional Piercers explains what makes jewellery safe to wear in a piercing, and their aftercare information is a helpful companion while each new piercing settles.

    Gemma